Light and Fast - You and Your Pack
 Thursday, January 6, 2011 at 02:59PM
 In the second installment of this piece I want to cover my choices for clothing, packs, related softgoods and fueling. Skis, bindings, boots and technique will be saved for the final chapter.
Suiting up
Covering more ground in a given tour requires going faster. Duh! Dressing for this effort and avoiding over-heating is key. Multiple layers of clothing have no place here unless the weather is nasty. Neither do hard shell anythings. Leave the Gortex at home. Wind resistant soft shell pants (Schoeller, or the like) or nordic full-zip warm-up pants are great. In more mild conditions, Lycra might even be the best choice. A wind-proof brief protects the boyz but I rarely wear a long john layer unless it's below zero. My motto is I should be cold leaving the trailhead. That's not to say I don't have layers in my pack but I simply rarely put them on.
I favor synthetic layers when I need them. Yeah, I know, wool is natural and all the rage and supposedly stinks less but I think it's mostly sexy marketing. Capilene and related thicker piles are lighter and dry faster than natural fibers. Yes, it's a petroleum product. That's an ethical discussion for somewhere else. I have a couple of wool items and, if it's snowing, I always regret wearing them. They are sponges and take considerably longer to dry. Even in my pack, the weight difference between similarly warm tops is worth considering. Your call. But remember, every ounce counts!
Call me a dork but I find that thicker, long-sleeve cycling jerseys work great here. The image conscious back country denizen will be uncomfortable sporting a bright-colored, sponsor-laden garment but these tops work well. The back pockets give you some options for stuff. They are typically stretchy and skins stay secure against your chest when stored there for the down.
If that does not appeal to your fashion sensibilities the Mammut Ultimate Hoody 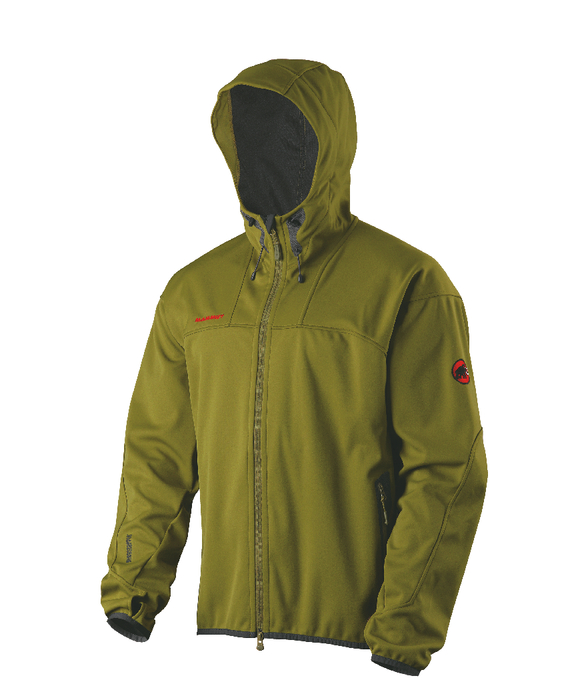 is another option I just happened to get for Christmas. It's light and features some unique zipper arrangements that maximize ventilation nearly eliminating the time-sucking element of removing one's pack. I'm partial to this jacket only because it has everything I'm looking for in such a garment. I assume that the other major manufacturers have similar products. For sure, the Swiss know what they are doing.
Head Gear
Certainly, our choice of hats can go a long way in regulating body temperature. I'm a big fan of nordic skiing oriented toques because they usually have some good ventilation up top while keeping the ears covered. Buffs are also good here but if it's snowing your head's going to get wet. For full conditions, I favor a light baseball style hat with a buff covering my ears. This keeps my ears from filling with snow and falling fluff out of my glasses.
Speaking of glasses, like Andrew McLean recently revealed in a similarly themed article on going light, I rarely wear goggles anymore unless it's really blower. Full-size cycling specs with either clear or dark lenses do the trick. When it's snowing, the visor of my hat keeps things clear. I'm going to steal a page from Mr. McLean's book and add a swatch of chamois for keeping my vision optimal. When I do opt for better coverage, goggles can be stored around the top of my thigh, ready for use on the down while avoiding the dreaded pack removal.
Hands
Gloves are obviously a very personal choice. Hand temps when exercising vary widely from athlete to athlete. My gloves tend to be light enough to keep on without turning into sweat boxes but warm enough to get me through a 5-10 minute downhill lap. Dealing with various glove changes during a tour is another time suck that almost every non-speed tourer endures. Of course, this is not really a problem when you have to mow through a sandwich and water your dog at the transition. But I digress…
The key to minimizing clothing stops is to simply keep moving. I cover this in detail in a later post. Bottom line here is that you must wear gloves, at least come time for the transition, no matter what the temps. I failed to heed this advice once during a skimo race relay event and paid for it with a trip to the operating room after severing a tendon in my thumb on my edges. Yikes!
Wear your gloves...or else!Pack it up!
This topic is vast. The numbers of packs and related hard goods for back country skiing has exploded in recent years. You buy the sexiest pack one season and they up the ante the next and you find yourself coveting the features of the latest one. When I started lightening up, those desires quickly faded. The truth is, the more features a pack has, the bigger the weight penalty. Potentially life saving features like air bags and breathing tubes weigh a lot. Bullet proof pack material weighs a lot. This topic becomes a huge personal decision. How much security are you willing to give up to cover more ground with less effort? How close are you willing to cut your margins? And what are the consequences to you and others if things go sideways? I answer these questions before each outing.
For me, a full-featured bomber pack is just not on the radar. I also do not carry the Avalung anymore and don't have any plans to get an ABS-style pack. Hopefully, I will never regret that decision. And until then, I will do my best to make choices that minimize my exposure to situations where one of these devices would be handy. This is part of going light. I just will not ski the sickest lines and I'm okay with that.
Lately, I've been using a Camp adventure racing pack with the outer mesh cut off.
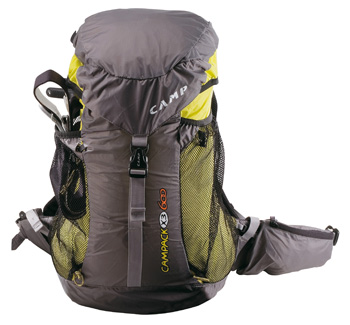 Camp X3-600
It holds my stuff and weighs next to nothing empty. No, it doesn't have little compartments for all my avy gear or a cool little pouch for my drinking system. But who cares? I never open my pack anyway until I'm back home. It does have a hook for holding my skis to the pack that I can use for booting without removing the pack and it has a little belt pouch for some food. That's it. I love it. The downside is that it is fragile. The material is light ripstop but a little Seam Grip from time to time takes care of most issues and gives it some character.
In more mellow conditions, a full-on skimo race pack will work just fine.
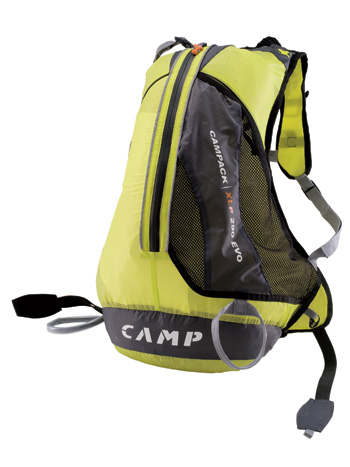 Camp XLP 290 Evolution
A lot of my training lines up on Teton Pass are pretty close to the road and well-traveled. I feel comfortable leaving some of the stuff in my pack behind. Lighter and faster still. Kind of like crack cocaine! Both Dynafit and Camp USA make popular packs for racing.
If I'm carrying gear with sharp points (crampons, ice tools, etc.) I'll use my Black Diamond Speed 28.
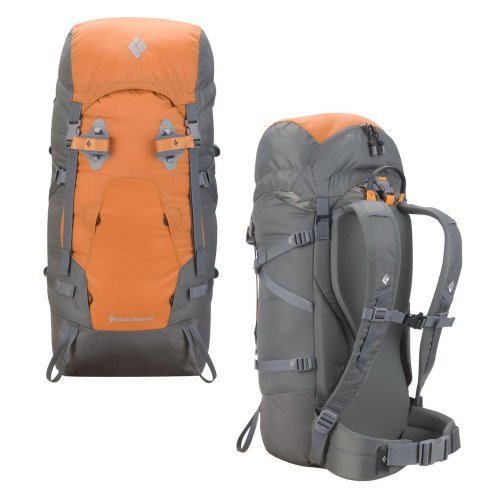 Black Diamond Speed 30/28I've had it for a long time. It's covered in Seam Grip. But I love it's simplicity and weight. The newer version is beefed up and better featured (if there is such a thing) but still comes in at 1lb 6 oz. stripped and 2lbs. 4 oz. stock. Some of Dynafit's larger offerings can handle the gear requirements of more technical lines nicely.
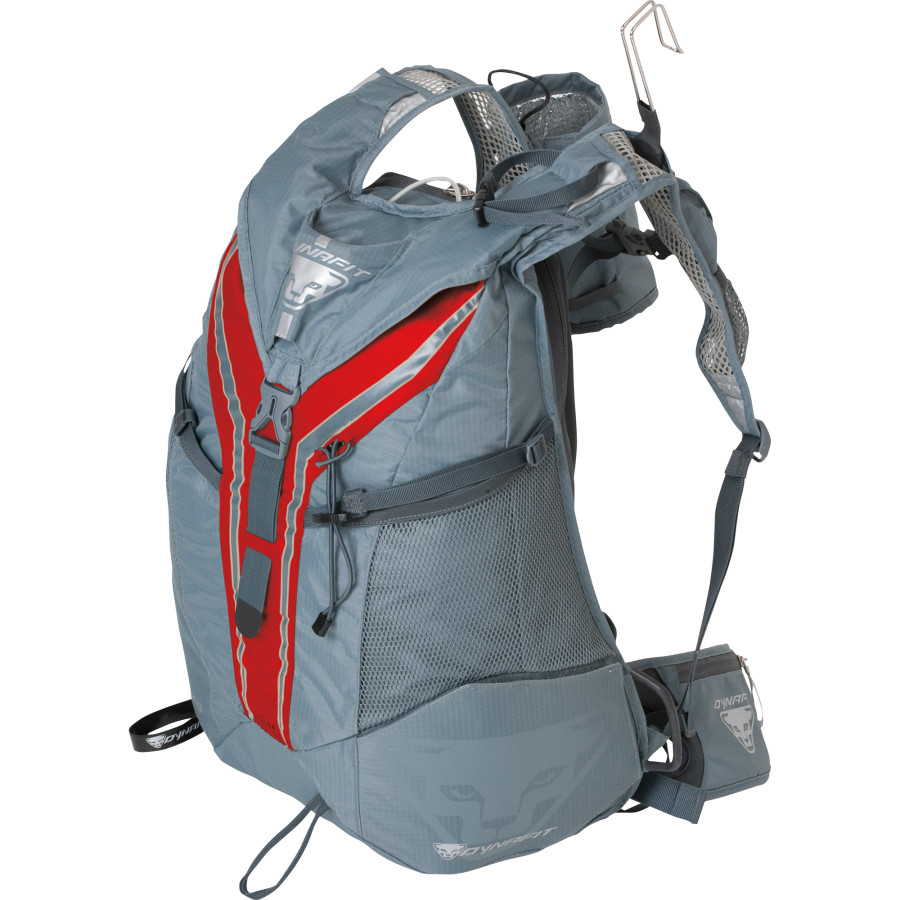 Dynafit Broad Peak
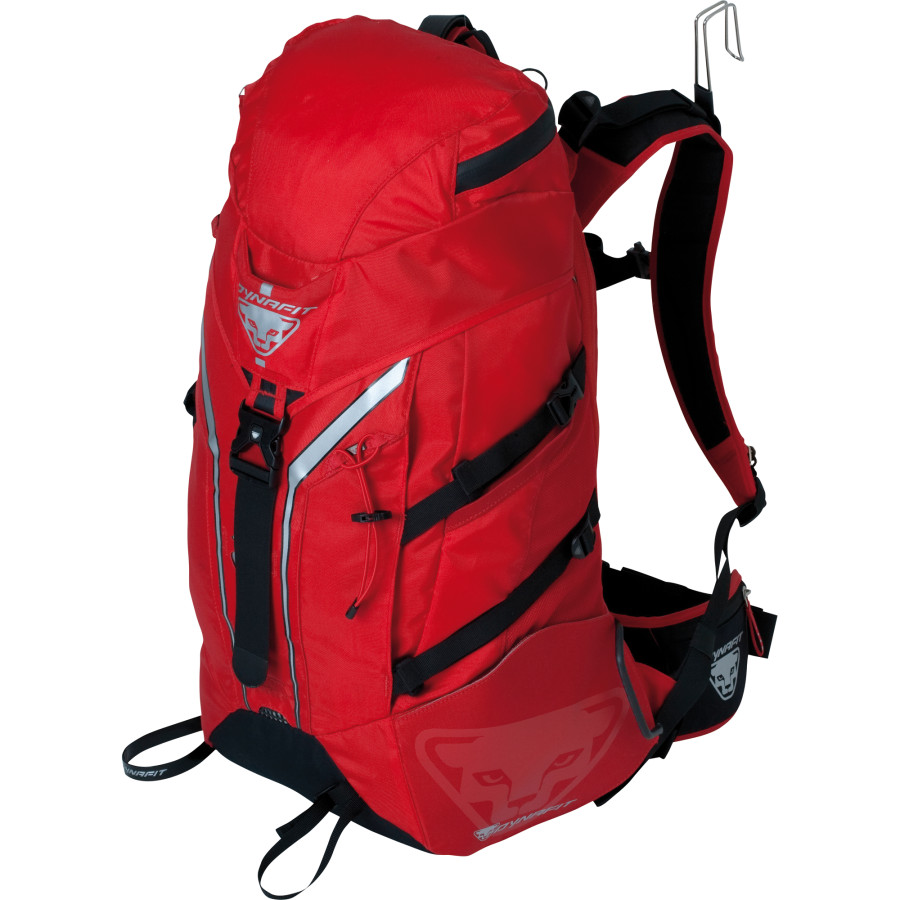 Dynafit Manaslu
They even have a separate little storage area for crampons that's fully protected from the other gear. This goes against my simplistic nature but I have to admit it's pretty sexy.
The bottom line here is that it's easy to look at all the shit IN your pack and forget that your pack empty weighs 4-5 pounds. Pay attention! Do you really need that heavy thing?
What's Inside?
Now here's a place to cleave some fat! There's so much stuff in the bottom of many people's beater "classic" Life Link packs they've no idea. They wear these things like badges just to show us how long they've been in the back country, telemarking on first generation T2s or, better yet, leather boots. Awesome. But all those half used sticks of kick wax, stale granola bars and petrified Kendall Mint Cake weigh a lot! Clean the damn thing out and only take what you really need, perhaps a few extra calories in case something stupid happens.
Again, it's risk assessment time when putting the pack together. Where you are going, how far from the road, temperature, conditions and partners all play a part in this process. Admittedly, I go out alone regularly. Most of the time, I'm not alone on the hill but I pack like I could be. My first thought is what would happen if I blew my knee and had to hunker down. To this end I bring a pretty plump down puffy, Mylar bivy sack, wind pants, extra warm hat, some hand warmers and extra gloves. I'd probably make it to morning. Added to this at the bottom of my pack is a pretty complete repair kit and headlamp along with goggles. Depending upon conditions I'll trade out my real shovel for a Snow Claw. I still have a probe but after reading Andrew McLean's take on it I wonder why. Even if I'm alone I still bring a beacon so they can… 1) find my body, and, 2) I can assist if I come across a situation needing my help. All these items have light and really light versions. Pay attention and go lighter!
Fueling up
If you are really covering ground then you won't be stopping much to eat. I have not sat on my pack once this year. This means no thermos of tea, tasty sandwiches or anything else that needs to be stored in the pack. Nuts, chocolate, gels and anything else tasty that can go in my pockets does the trick. I get something down at transitions and keep moving. Although I curse them at times when they leak, I'm using hydration bladders regularly. I find I hydrate more often with one. The biggest trick I've learned is to wear the bladder on my back UNDER my clothes and pack. I run the hose over my shoulder but it stays under my layers. It never freezes. Camelback even makes a slick little pull-on vest with a hydration bladder pocket in back.
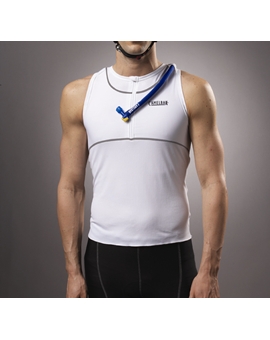 Very slick. In this almost always goes 1 to 2 liters of some sort of calorie-containing beverage. Plan on 300-400 calories an hour. Throwing in and forgetting about a couple of candy bars at the bottom of your pack will bring you serious joy when faced with an unexpected night out. Just remember to switch them out next season! - Brian


Reader Comments (1)
Good luck on Saturday, race well!